
Get started with SizeGrid
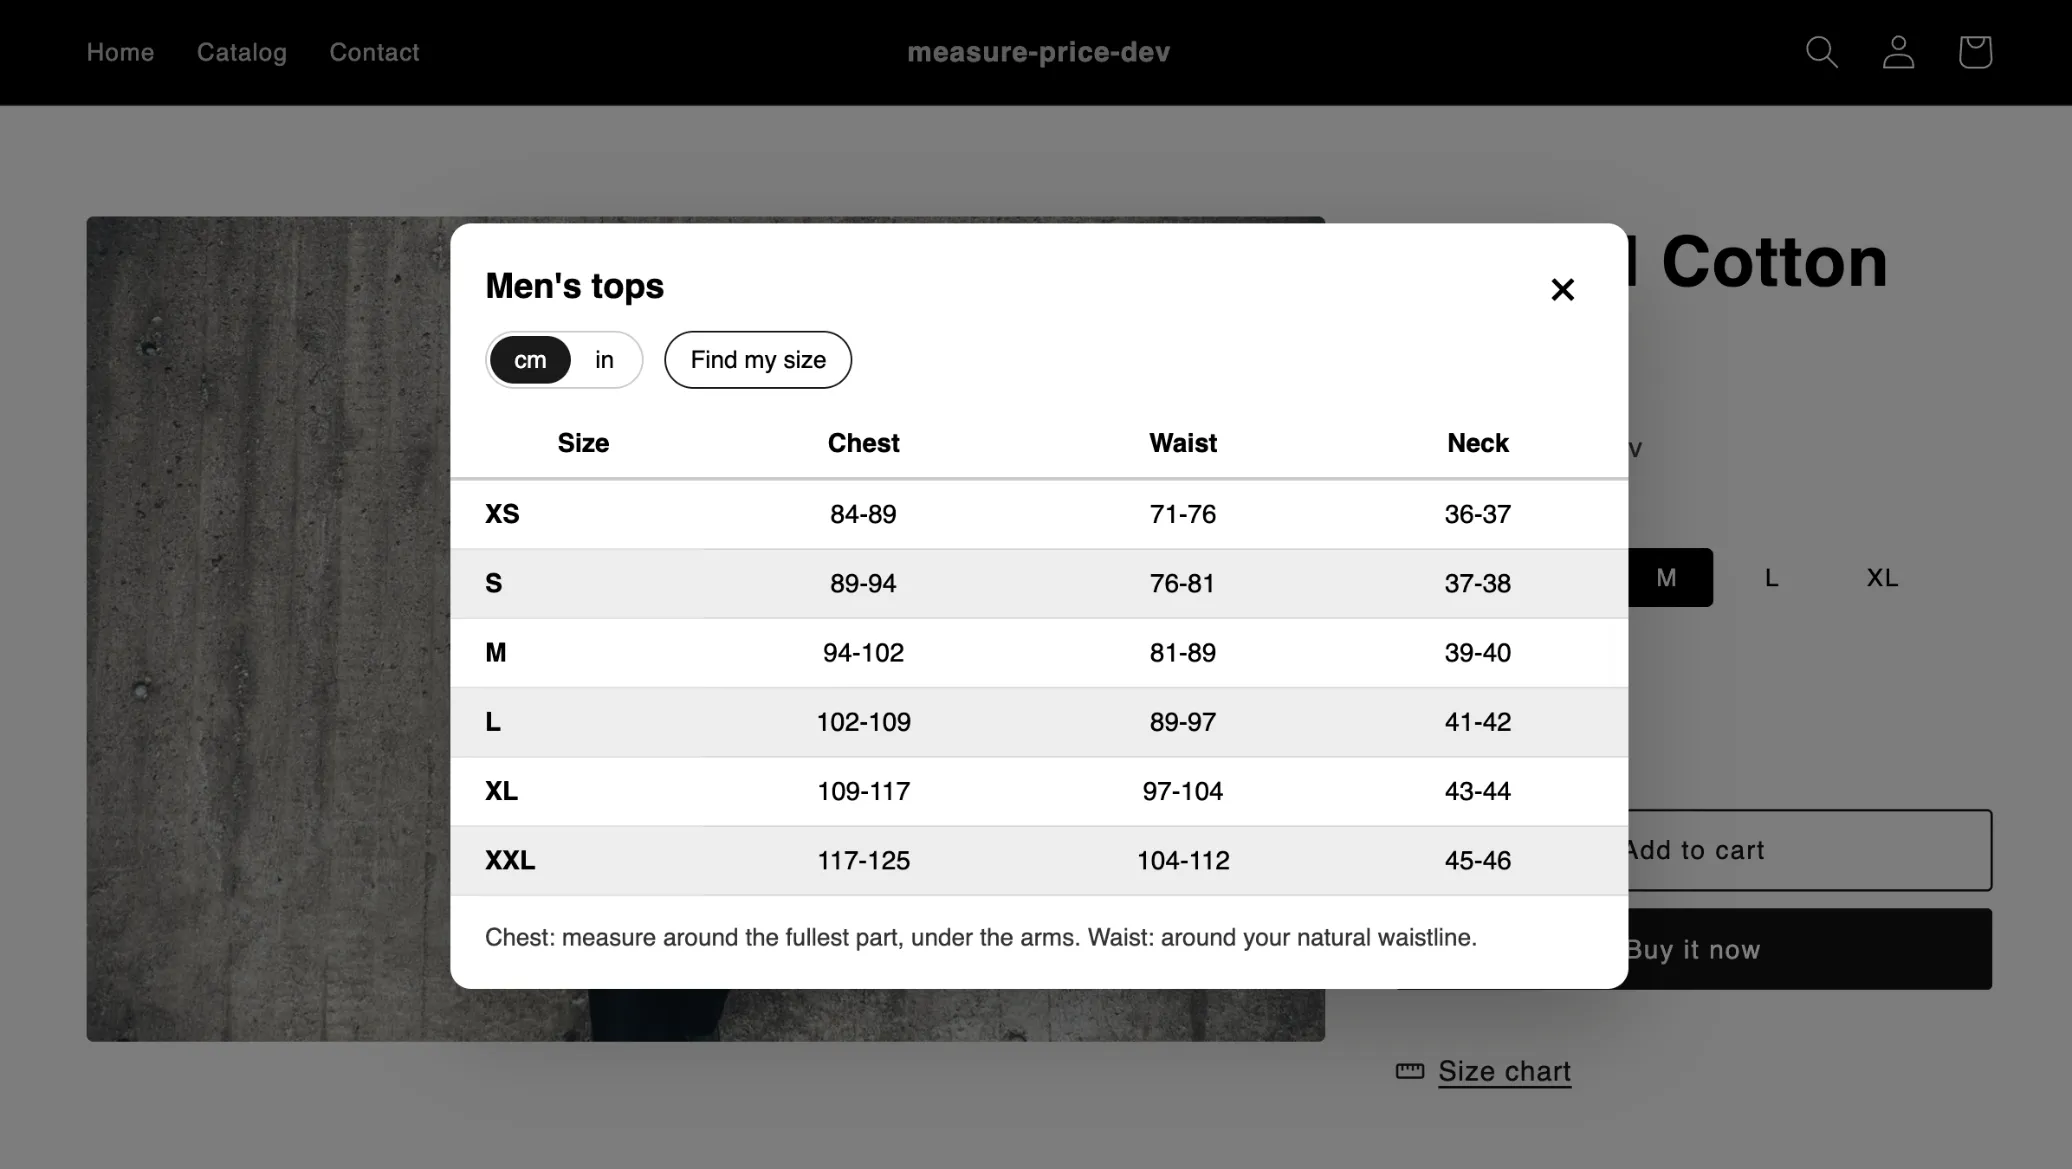
SizeGrid shows a size chart on your product pages. Shoppers open it from a Size chart link, switch between cm and inches, and can find their size from their measurements.
1. Install and open the app
Section titled “1. Install and open the app”Install SizeGrid from the Shopify App Store and open it from Apps → SizeGrid.
2. Make a chart
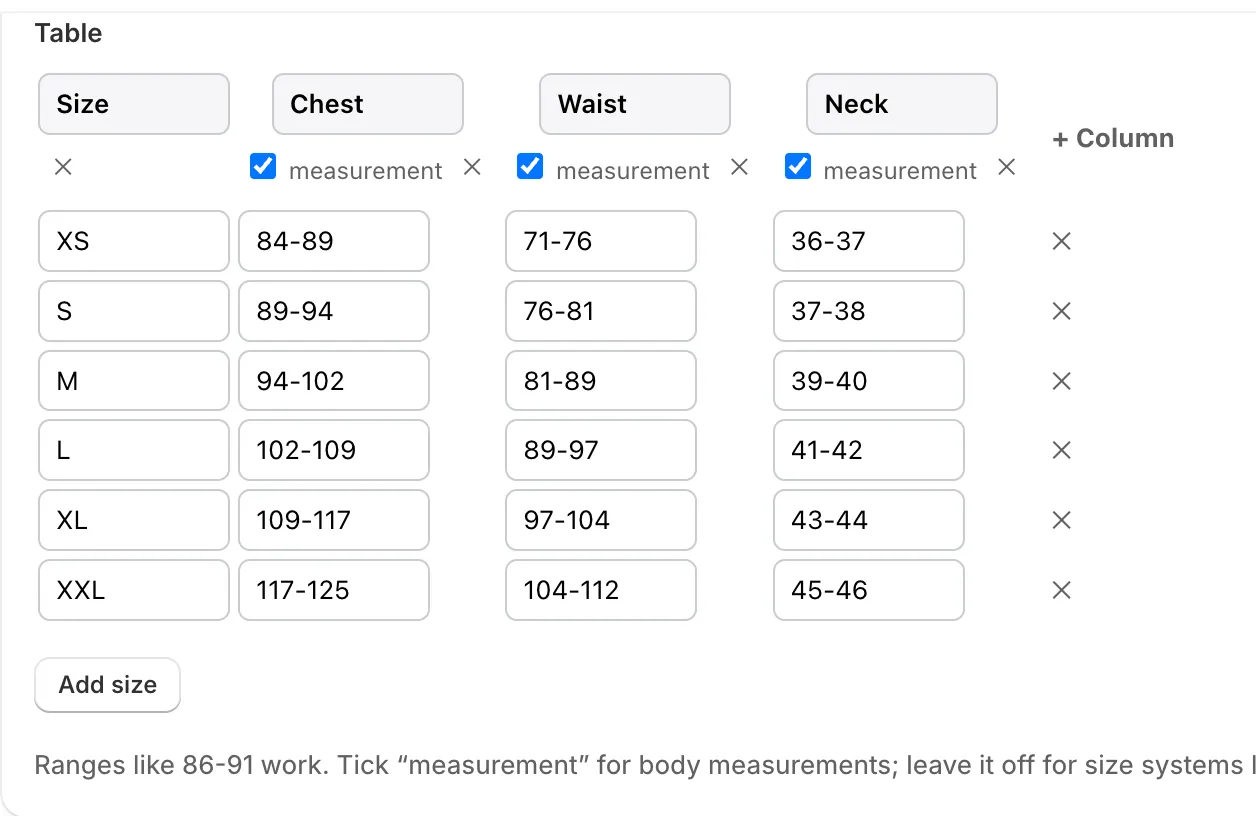
Section titled “2. Make a chart”Under Charts, pick a template (men’s tops, women’s tops and dresses, trousers, shoes) and edit it, or click New chart. You can also:
- paste a table copied from Excel, Google Sheets or Numbers;
- upload a CSV file;
- read a chart from a photo, screenshot or PDF (see Import and backup).
Tick measurement above every column of body measurements (chest, waist, foot length). Those numbers convert between cm and inches. Leave it off for size systems like EU, UK or US.
3. Choose which products show it
Section titled “3. Choose which products show it”Under Which products show which chart, click Add rule: choose the chart and a condition, for example Product tag is tops. Click Save rules. See Charts and rules.
4. Add the block to your product page
Section titled “4. Add the block to your product page”Click Add block in theme editor. The theme editor opens your product template with the Size chart block added. Move it under the variant picker if you like, and click Save.
5. Try it
Section titled “5. Try it”Open a product that matches your rule and click Size chart. The chart opens over the page; switch to inches, or click Find my size and enter a measurement.